.svg "SpotDevLogoOrange (2)")
The humble landing page: such an unassuming name for such a vital part of your inbound marketing campaign. If you haven't created any yet or aren’t quite sure what they are, you might just be missing one of the most crucial components of a campaign. Without a landing page, conversion gets a whole lot harder: it’s something all of us needs on our website.
Since working in inbound marketing, I’ve heard people refer to all sorts of things incorrectly as ‘landing pages’ – mostly, people seem to think it’s just another word for a webpage. But a landing page does so much more than simply hold content. It is not a product page, a pillar page or a service page: a landing page goes far beyond that.
In this post we will explore the function of the landing page and I’ll show you some best practices, before walking you through how to create one in HubSpot – I promise it’s such an easy process that you’ll be building your own in no time at all.
The point of a landing page
A landing page is the page a visitor arrives at right after they’ve clicked one of your CTAs, expressing their interest in downloading or accessing one of your fantastic pieces of content. This CTA might appear on a blog post, pillar page or social media message and will say something like “Download the guide”. When a visitor clicks on that CTA, they are brought to a landing page.
Landing pages are key to your wider marketing strategy because they are the gateway to the precious content visitors want to get to. But you can’t just have the CTA linking straight to the content: free content is an excellent practice as part of your wider marketing strategy, but these more comprehensive, exclusive content offers need to be gated behind a landing page. In order to access the content offer, visitors must submit a few pieces of information in a short form first.
This allows you to capture their data, such as their name, email address, profession, geographical location, size of organisation or phone number, in exchange for them downloading your content: everyone is happy! Therefore, the landing page needs to include particular elements to perform really well and become a useful lead generation tool for your business.
Best practices
There are loads of fantastic examples out there, and a great landing page needs to do a few different things. A comprehensive, high-performing format has been agreed upon by most marketers, which looks something like our own example below:
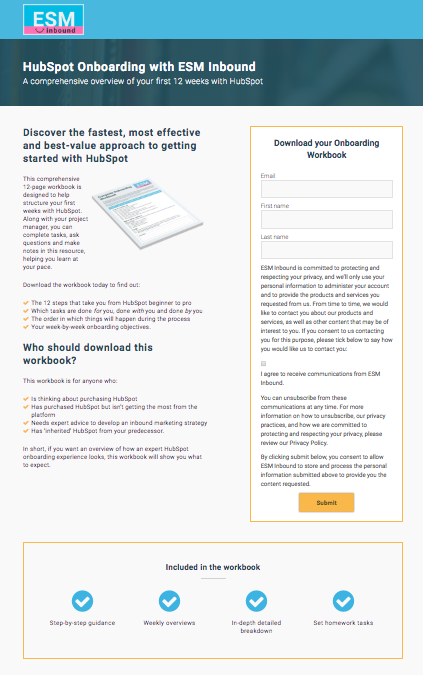
Let’s take a closer look…
Tip 1: Remove the navigation bar at the top – you don’t want visitors getting distracted and returning to other pages on your site once they’ve arrived at the landing page, you want them to commit to filling the form in.
Tip 2: Use clear branding that matches up with the place they’ve just come from: use your logo in the same position as other pages, use familiar brand colours, font and language that mirrors the rest of your site – don’t confuse visitors.
Tip 3: Use the same title for the content offer that you did on the blog post or social media message they just clicked on – make sure the offer is really clear and a visitor knows exactly what they are downloading:
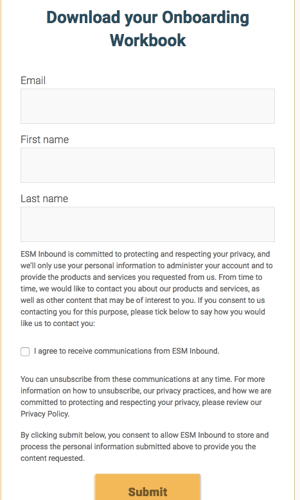
Tip 4: Include a form that isn’t too long, but encourages submission of the most useful information you need from a prospect (see below).
Tip 5: For a small download, you might only request the name and email address of the person (as in the form below), but for a more complex interactive tool or access to a gamified resource, you might want to add a couple more fields to the form: for the right content, most visitors won’t mind relinquishing a few more details.
Tip 6: Always ensure your form complies with GDPR regulations; when handling people’s personal details it’s vital to include wording such as our example below shows – and to act on your words.
Tip 7: Include an image representing the download to help the visitor visualise the offer: they probably aren’t receiving a physical copy of your content, but having a visual helps solidify its worth and persuades them to fill in the form.
Tip 8: Use easy-to-read, concise copy to explain a little bit more about what they’re getting. Use bulletpoints and short paragraphs to do this but don’t overload the screen with writing.
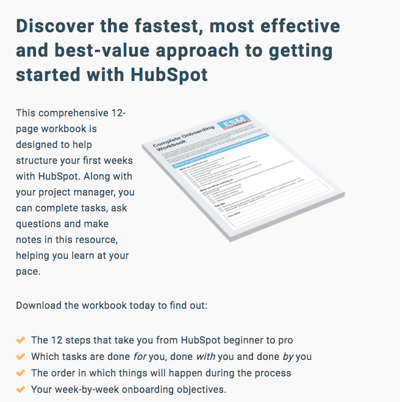
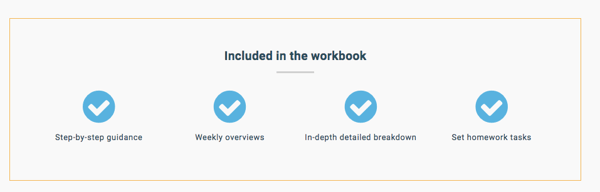
Tip 9: Use a box out to act as a summary of what the content offer includes – base it around their pain points so that if the visitor doesn’t want to read the more detailed copy above, this acts as an overview.
And there you have it: the best practices of a complete landing page. You can do that, right? So now it’s time to take a closer look at how to recreate this in your own HubSpot portal.
Create a HubSpot landing page
Now that you understand best practices for landing pages, it’s important you can build one yourself in HubSpot. This walkthrough should help you understand how to confidently build one, whether you’re using pre-existing templates or building one new from scratch.
If you’re brand new to landing pages, take advantage of the templates HubSpot offers to help get you started. Once you grow in confidence, you can build your own templates to use time and again.
Step 1
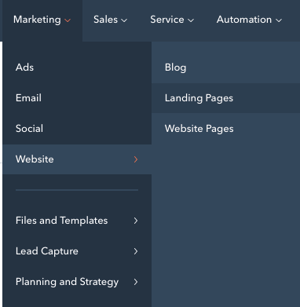
Go to Marketing, then click Website, and Landing Pages:
Step 2
Click ‘Create landing page’ in the top right-hand corner. Click a template to use as the layout of your new page. You can create a template or edit an existing template in the design manager tool. There are also templates available on the HubSpot Marketplace.
Step 3
Give your new page a name; something that you will recognise straight away for future use e.g. ‘Onboarding workbook LP’.
Step 4
The page will appear in your HubSpot account – all you need to do now is click ‘edit’ and you can start writing the content directly into the page, seeing how it will appear to visitors in situ as you do.

Step 5
You can add content in two ways: directly into the content blocks where the pencil icon is shown:

Or by going to the left-hand side where a 3D box shape is shown; this is the module list and you can edit different sections of the page in there.
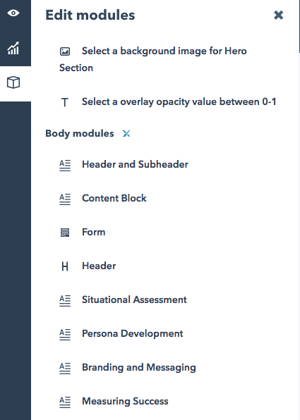
Step 6
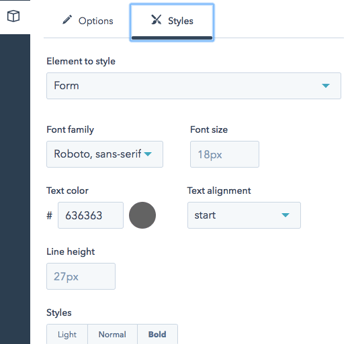
Use the module sidebar to play around with the order and structure of your page: experiment with the positioning of columns, your form and other modules using the ‘styles’ icon until you’re happy with how it looks – always remember your form is the most important part of the landing page so make sure it’s the first thing visitors see:
Step 7
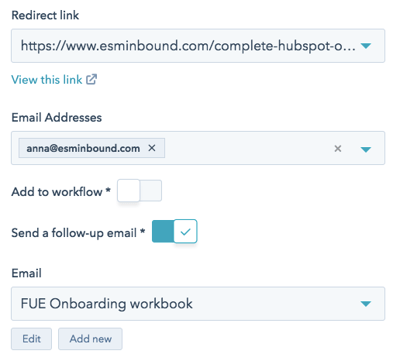
This sidebar tab also gives you the opportunity to choose where your user will be redirected to once they submit their form (see below). This will usually be a thank-you page, acknowledging your appreciation to the customer, and offering the download as promised. You can easily add the link into the ‘redirect link’ field (and make the thank-you page in the same way you’re making the landing page).
This is also the chance to trigger a follow-up email – attach a pre-created email to your landing page and every time someone submits the form on the page, a tailored email will be sent to them with the content offer attached (so they also have it safely stored in their inbox). Now you have their email address, you can send them other content offers you think they’ll find useful and move them along in the buyer’s journey.
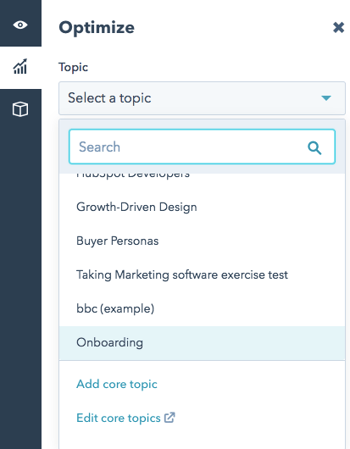
Step 8
Now that you’ve explored the module section of the sidebar, look at the graph icon above it: this is your ‘Optimize’ area. This is where you attach your page to one of your existing topics to anchor is in a campaign, ensuring more people find it. I would attach this landing page to our ‘Onboarding’ topic:
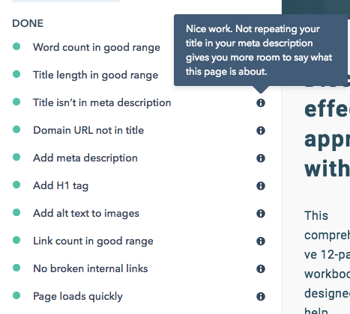
This is also the area that will show you if you’re missing out on any key optimisation drivers, such as broken links, page length and URL title mistakes. If anything needs fixing, it will be highlighted in this list; once it’s rectified it’ll turn green, as below:
Step 9
Once you’re happy with how your content looks, save it and move along to the ‘Settings’ tab at the top of the page. The following fields will be presented to you:
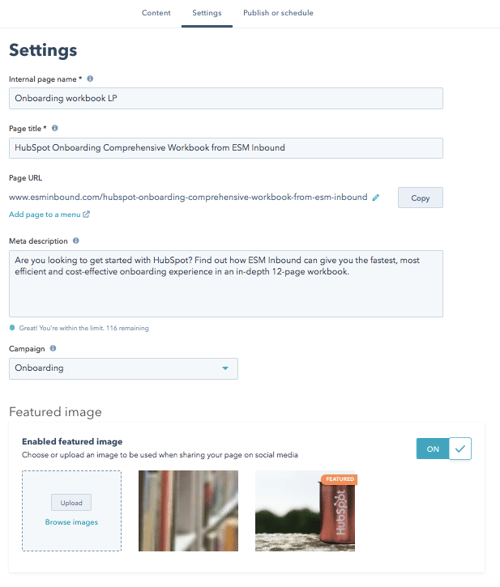
Internal page name: This is only visible to you; use the same name you originally did in your dashboard. Make it an obvious title so you and your team can distinguish between different landing pages.
Page title: This is publicly viewable; it’s the title that displays in the tab at the top of your web browser when the page loads, so again use obvious keywords to describe it.
Page URL: This will appear in the URL field as you type in the page title box, but if you want it to be different, you can edit it, even once live.
Meta description: Add a short description of your campaign; this content will appear in search results below the page title. To keep it neat and fully visible, limit it to the characters given to you by HubSpot.
Campaign: associate your page to a HubSpot campaign – here I selected ‘Onboarding’. Select ‘Add new’ in the drop-down box to create a new campaign.
Featured image: Choose a relevant, specific image to be featured when your page is shared on social media. Click ‘Upload’ to select an image from your computer or ‘Browse images’ to select an image from your previously uploaded history.
Step 10
Now click on the final button on the side toolbar – the eye. This enables you to take a look at your page, as it will appear across multiple devices, from desktop to tablet and smartphone.
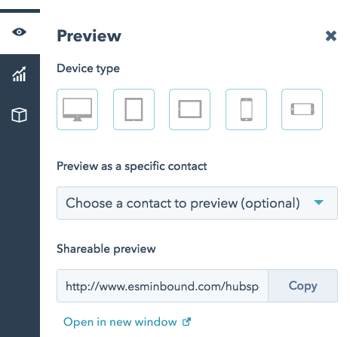
If you want to know how a specific contact will view the page, you can search their name using the drop-down menu on ‘Choose a contact to preview’ and view their screen as if you are them.
The final ‘Shareable preview’ field allows you to view your landing page on your screen as it will appear, before it is published: copy the link into your browser to take a look, or click on ‘Open in new window’.
Step 11
It’s time to publish or schedule your page! When you go to the final ‘Publish or schedule’ tab at the top, you’ll see this screen:
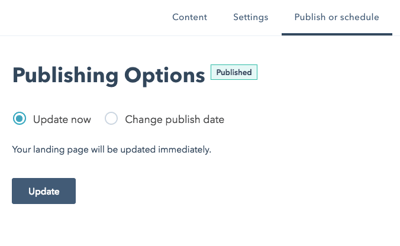
If you’re scheduling for later, you’ll be prompted to choose a date and time.
Remember: Whenever you do set your landing page live, you must ensure the other elements of your conversion sequence are also live at the same time. If you launch your landing page and link blog posts and other content to it, the whole chain of actions needs to be working. For example, if someone submits a form on your landing page but the thank-you page isn’t yet live, they will get an error message and you may have lost a lead.
Gated content is one of the most important things your business can be doing to generate leads and grow trusting relationships with them. We hope this post has been helpful in walking you through how to utilise the landing page features in HubSpot – get practising and we hope you start seeing positive results fast.
Our content includes affiliate links. This means that we may receive a commission if you make a purchase through one of the links on our website. This will be at no cost to you and helps to fund the content creation work on our website.