.svg "SpotDevLogoOrange (2)")
Prominent management consultant, Peter Drucker once famously said:
"If you can't measure it, you can't improve it.”
After a prestigious career, 39 published books and living to the age of 95, I think we can all assume Drucker knew a thing or two. And this is the philosophy we foster at SpotDev: we don’t start anything unless we can measure and improve it.

With the help of HubSpot as our versatile tool, we build dashboards – we love dashboards – to help us monitor each and every marketing campaign we create. That’s not just for our own marketing, but for our clients, too. As HubSpot themselves put it:
‘From the moment you create a campaign in HubSpot, you open the door to a wealth of data. From the forms you build, to the landing pages you run, emails you send, and everything in between – HubSpot reporting can help you understand your performance.’
We understand that many businesses want to monitor this ‘wealth of data’ themselves, but it can seem overwhelming when you’re not used to it; how do you know which metrics matter? In this piece, we'll show you how to monitor your inbound marketing campaign with a little help from HubSpot.
Step 1: Tag your campaign
Fortunately, for those using HubSpot, they’ve made it super easy to tag all the separate elements that build a campaign with the same label. This keeps them nicely together in one space within Marketing Hub, and makes measuring the overall performance of an individual campaign all the easier.
So you might have all the following content associated with the same campaign e.g. 'recruitment campaign':
- A pillar page
- A gated content offer
- A landing page with a form
- A thank-you page
- A follow-up email
- Multiple blog posts.
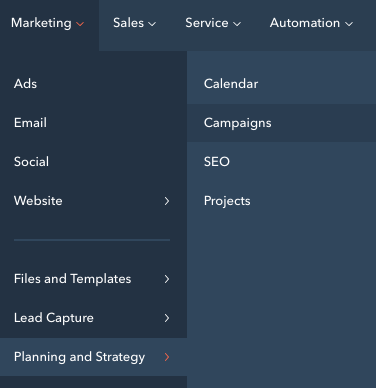
 This means that data all ends up in the same place when you want to review your campaign’s success. When you're ready to review your data so far, start by going to Marketing, then Planning and Strategy, then Campaigns:
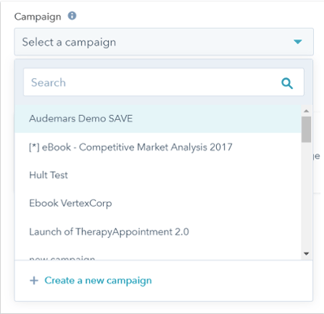
Once you click into campaigns, you can ‘create campaign’ to start a brand new campaign, or choose one of the existing ones if you’re here to monitor the performance of live content. (And with 1,000 campaign capacity in HubSpot, you’re likely to run out of campaign inspiration long before you run out of space!)
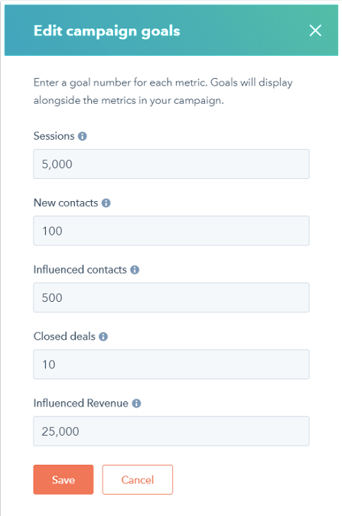
Add your goals as a reminder of what you’re working towards: your SMART goals will help you here, so have them handy. This means your ‘working at’ numbers will be shown alongside your ‘target’ numbers, making it really clear how far you’ve got to go (or if you’ve already hit your goals):
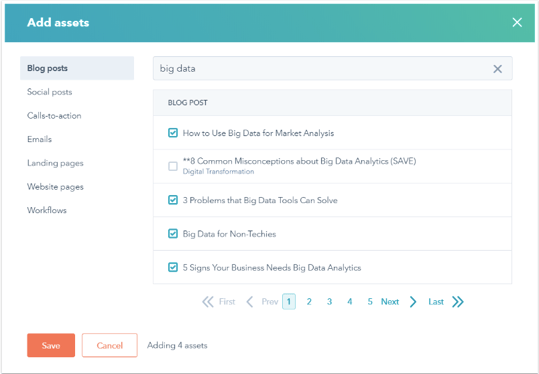
If you haven’t already, you can now go through all your content, listed by category on the left-hand side of the screen (see below), and select it to be added to your new campaign name:
And voilà! Your individual elements are now recorded in HubSpot as a campaign: don't forget to tag all future content assigned to this campaign to get an honest metric about how the entire campaign is performing. You’re now ready to start monitoring.
Step 2: Monitor your campaign
Remember: If the SMART goals you set up at the start of your campaign planning specified a particular date (as they should – remember, 'Timely'), you have to monitor your results until that time.
To keep an eye on the performance of the campaign in your dashboard as you go is good practice, and even making some tweaks to content as a result of poorly performing elements, such as a CTA that isn't getting any hits, or a low rate of new contacts finding the campaign.
But don't make any final judgements about the performance of the campaign until you've hit your time metric for a fair review. It’s easy to start worrying that your campaign isn’t hitting the metrics you’d like to see, but you set yourself a timeframe target for a reason, so let it play out before you start reporting.
Clicking onto an existing campaign will present you with a dashboard like this:

This is an overview of the campaign's performance (the figure underneath each number is the goal you set, as mentioned above, so you can see how far off you are from hitting that performance metric). The meaning of each metric is below:
- The number of sessions – how many individual visits to your site have occurred as a result of this campaign.
- New contacts – who visited your website through this campaign that’s never visited before.
- Influenced contacts – how many contacts, both new and existing, have engaged with your campaign.
- Closed deals – how many closed-won deals there have been, related to contacts influenced by this campaign.
- Influenced revenue – how much closed revenue – the ‘closed amount’ of closed-won deals – is related to contacts influenced by this campaign.
You can now click on each element e.g. blog, and get a further breakdown of how contacts are engaging with each part of your campaign. This means, if you have specific targets such as clicks, engagements, bounce rate or length spent on page, you can see in greater detail the part each piece of content is playing in your campaign. Below, you can see a closer view of what the six blog posts associated with a campaign might show:

Step 3: Report your campaign
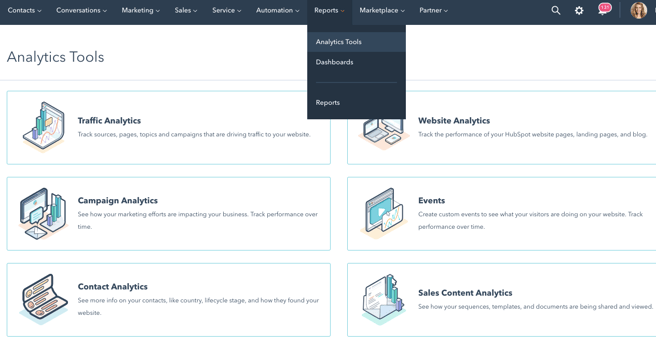
Once you're ready to draw conclusions about your campaign, open the Reports tab, then select Analytics Tools. A page will come up with lots of options – click on Campaign Analytics:
A dashboard will appear which might seem a little overwhelming at first, but needn’t be. You need to select your date range and frequency to analyse the period you’re interested in, and away you go! The arrow below shows you where you can change the aspects to focus on, from Sessions to Influenced Revenue, depending on your SMART goals.
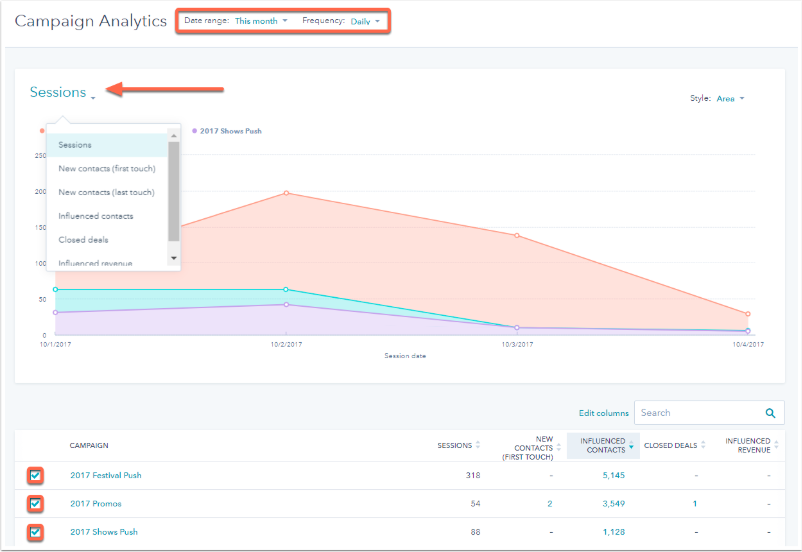
Remember: Don't focus on vanity metrics, or other irrelevant measures. For example, if the SMART goals you outlined at the start were focused on increasing new contacts and engagements, don't start focusing on returning customers.
You can select the column headers you want to include in the report (below the graph) by clicking on them. And, if you’re more of a 'column chart person' than 'area chart lover', you can change the format your data is presented in, by selecting the ‘Style’ button in the top right of the screen.
These reports are ideal for reviewing campaigns with colleagues and management to provide an update, analyse interesting findings and plan for your next steps. HubSpot’s reports are easy to understand thanks to their uncomplicated format and the minute detail you can isolate from each campaign.
What to do next
Getting your hands dirty, exploring your HubSpot portal and really digging into your data is something we recommend for all our clients. Our target is to get you confident and capable with your campaigns, not just for us to do it for you – we can help you as much or as little as you require.
We can also help your team plan, implement and review your campaigns, doing as much or as little of the workload as you and your team requires. At SpotDev we pride ourselves on our onboarding process, walking you through the stages, from building your buyer personas with you, to planning and creating your campaign and launch, then your portal review.
Remember: If you can't measure it, you can't improve it. If you live by this mantra for each and every inbound marketing campaign you create, even campaigns that don't hit your goals will be worthwhile; disappointing results teach us just as much about our audiences as successful ones. But if you aren't monitoring, you aren't learning a thing.
Our content includes affiliate links. This means that we may receive a commission if you make a purchase through one of the links on our website. This will be at no cost to you and helps to fund the content creation work on our website.